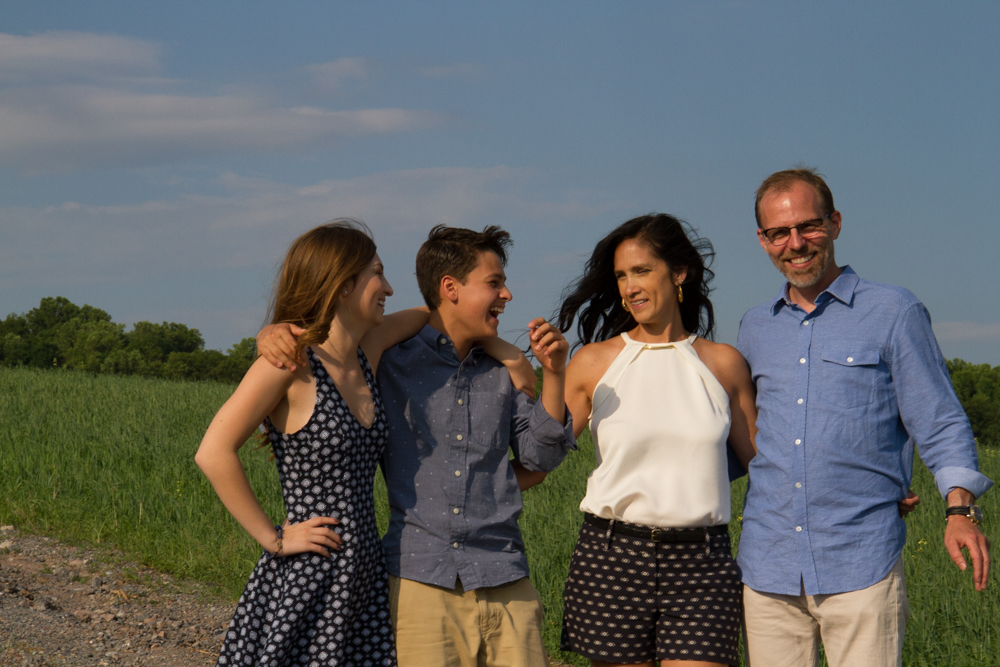
Family Dynamic
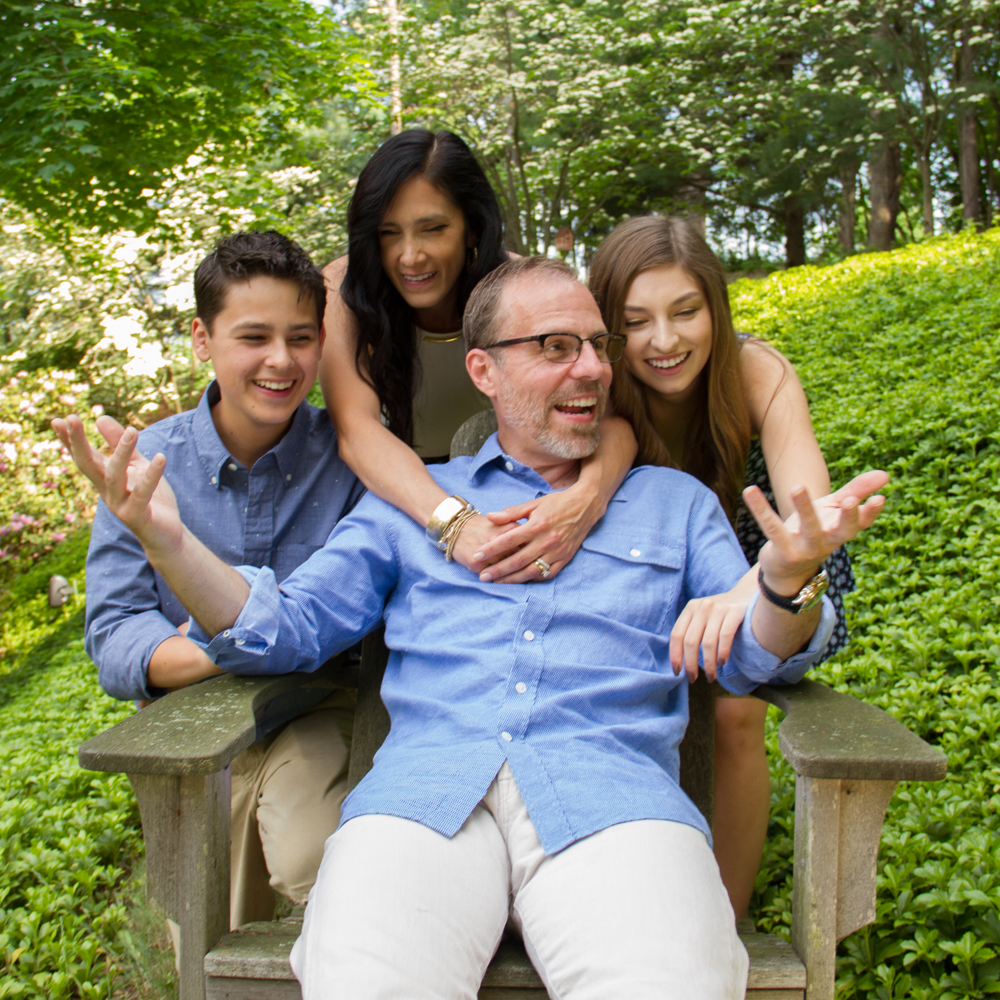
Last weekend, I had my first family shoot of the summer: 4 family members, 3 locations, 2 hours, 1 photographer. I also bribed my friend Kalyn with dinner at Annie Bailey’s to come along and be my VAL (Voice Activated Light Stand). Reminder to self: Need intern. Check.
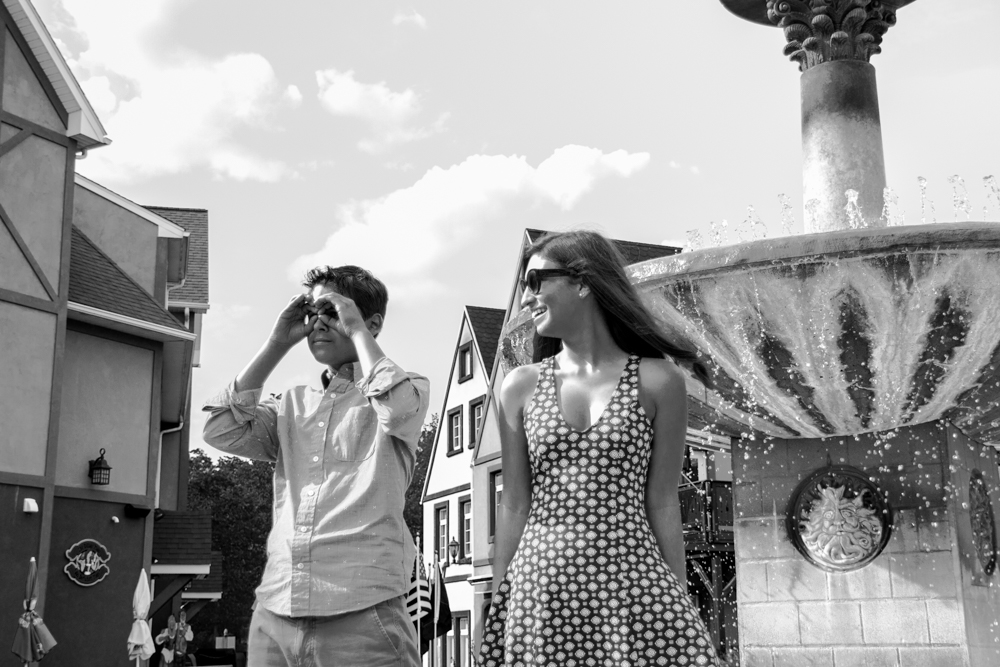
My favorite kind of family photography are the candids: the shots that capture the true dynamic of the family. Yes, I like the mantelpiece shots where everyone is happy, beautiful and smiling at the camera, but I LOVE the shots that come just after that one, where someone cracks a joke or rolls their eyes or slips in an extra hug. In short, I like the real stuff.
But how do you get the real stuff? That can be the tricky part. Let me break it down for you in the five steps:
1. Break the ice. I like to start every family photo shoot with my five minute spiel about how I work and what kind of shots we’re looking for– really just trying to break the ice. Everyone is usually pretty stiff and uncomfortable in the beginning of the shoot, which makes sense. You have an (almost) stranger in your face telling you to smile while keeping your chin down, head tilted, and if you could put your hand right there... So just taking a few minutes to review the game plan and letting them acclimate themselves to you is extremely helpful.
2. Give them some ideas. Hello, they’re not models! So it’s important to give the family some posing guidelines in the beginning so they have a starting point. As the shoot goes on, I usually do some more loose posing or let them suggest poses, but in the beginning, it’s important to give them more direction.
3. Let them alone. Sometimes the best photographs are getting them into some loose posing (Okay, stand by the corner of the barn, face me, you on that side, you on that side, fix that hair… okay, now just talk to each other for a minute… does anyone know any jokes?) and then just let them alone while the family dynamic unfolds. Making the family feel comfortable being themselves and around each other in front of the camera is the most important part of candid family portraits.
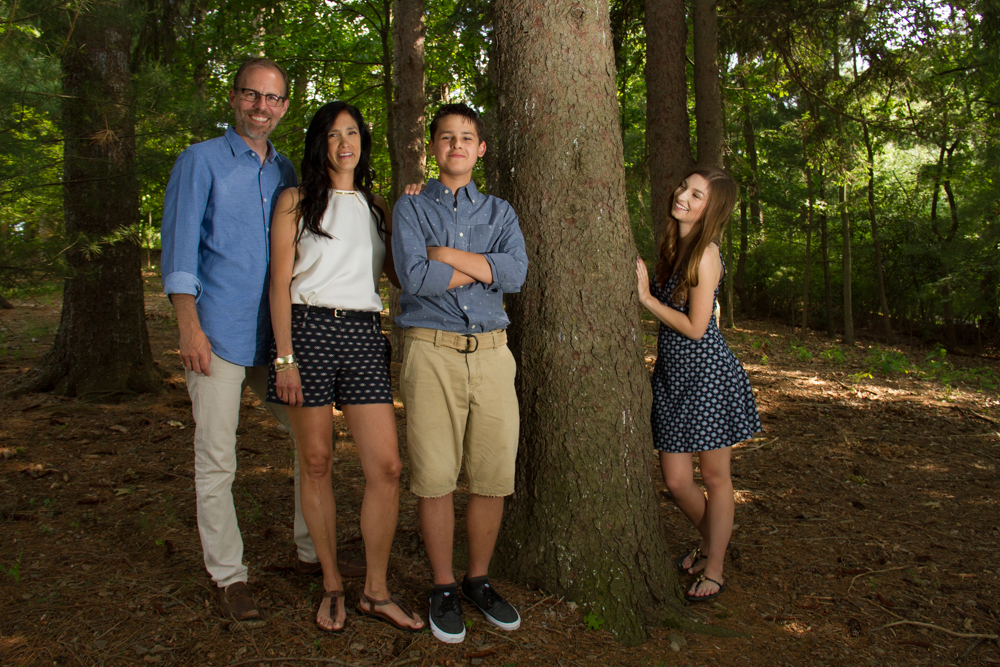
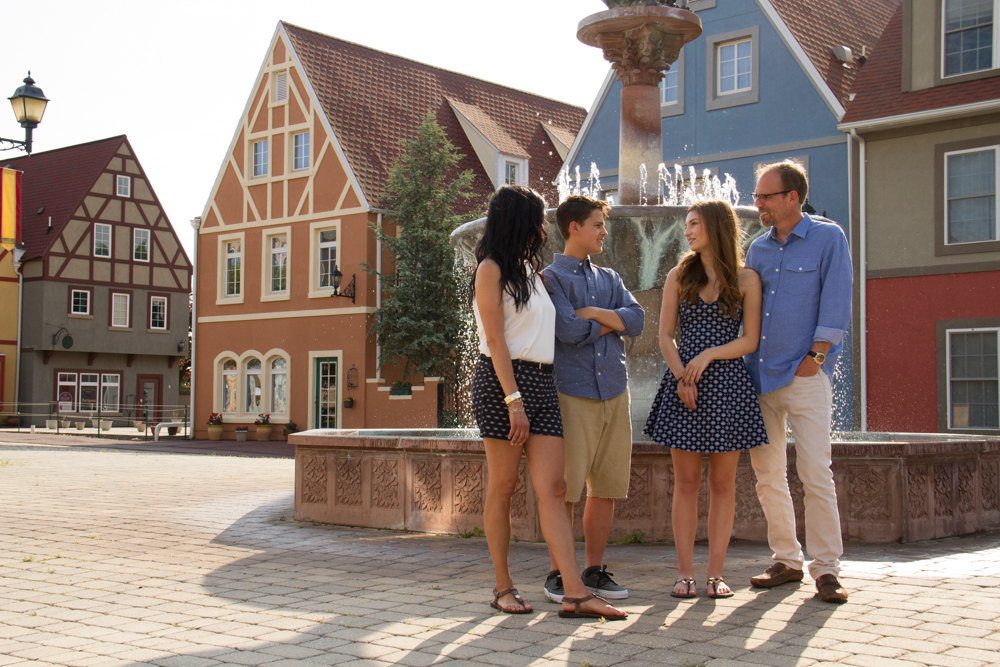
4. Pick your locations well, Ke-mo sah-bee. And scout them before the shoot whenever possible. This particular shoot was at three different locations, so it was not only important to know which shots we wanted to get at each location, but what order the locations needed to be in for optimal lighting.
5. Include personal details. Yeah, it’s cool that everyone looks great and the location is rocking, but personal details that are unique and specific to the family are what makes the difference. That can be including family pets, shared hobbies and activities, or locations that are meaningful to the family.
Easy, right? I mean when you don’t factor in weather, schedules, permissions, travel times…wait, this sounds like another blog. Until next time, enjoy the Vaughn family photos and special thanks to Kalyn Hope for helping out with the lighting.


Light Painting
Last weekend, I checked an item off of my bucket list and attended a light painting workshop conducted by Harold Ross.
Me, light painting my little heart out.
Last weekend, I checked an item off of my bucket list and attended a light painting workshop conducted by Harold Ross. Light painting is a technique where the photographer, working in a dark studio, opens the camera up for a long exposure, and "paints" the light onto the subject primarily using flashlights. The end result is this gorgeous light that reveals more texture, color, and shape and makes your subject almost looks like a painting.
To learn more about about light painting and Harold Ross's work, click here.
I was advised going into the workshop, that it’s not an easy technique to learn. Luckily for me, I never assume anything is going to be easy, a theory borne out by my experiences with Geometry, parallel parking, and wakeboarding. I was prepared to add light painting to the list.
The workshop lasted three days, during which we learned about the technique, set up and light painted our own still-lifes, and then did all of the back-end production work in Photoshop. It was intensive, to say the least, and at times overwhelming. My fellow workshop attendee, likened it to “sucking on a fire-hose” because there was so much information to absorb.
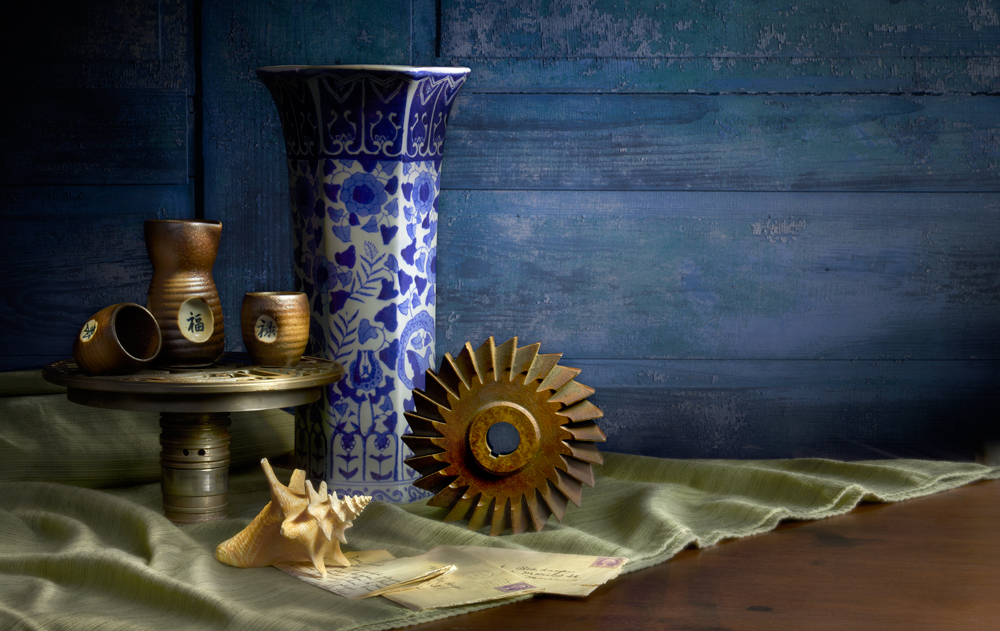
My still life without light painting. Note how bland and awful it looks.
The most challenging part of light painting is that it’s just as much of an artistic process as it is a technical process. You have to have a feel for it. While trying to light our still-lifes, I kept being remind of this scene in Apollo 13, where the crew has to manually readjust the angle of their entry trajectory by a matter of degrees in order to enter the atmosphere safely. If they were too steep, they would burn up, if they were too shallow they would skip off the atmosphere. Watch the scene here.
Similarly in light painting, getting the right angle is critical to the process. I needed to be able to shine and move the light at a certain angle, from a certain distance, at a certain speed, for a certain length of time in order to properly light my subject. If I’m making that sound easy, then I’m not describing it right. Verbal exchanges during each exposure would go something like this:
“Okay, here we go… Open!... Bring her around… you’re drifting!... No, hold what you’ve got…. Come to the right a little bit… Crap, I’m losing it… Back, back! That’s it. Steady. Close!”


And repeat. Light painting happens in a series of exposures/shots that you have to combine into one in Photoshop. For an example, look at my seashell. I had to light the front of the shell in one photograph and the back of the shell in another so that I could get shine the best light on both sides. Now start counting up all of the objects in my still-life, and you’ll begin to get an idea of the scope of what light painting a scene really takes.
So was it intensive?
Yes.
Challenging?
Definitely.
Worth it?
Well, I think the end result speaks for itself, don't you?
Booyah.